
Volume 90%
Press shift question mark to access a list of keyboard shortcuts
Keyboard Shortcuts
Play/PauseSPACE
Increase Volume↑
Decrease Volume↓
Seek Forward→
Seek Backward←
Captions On/Offc
Fullscreen/Exit Fullscreenf
Mute/Unmutem
Seek %0-9

Beginner
|
28 min
|
00:53
|
|
02:23
|
|
08:02
|
|
08:45
|
|
07:57
|
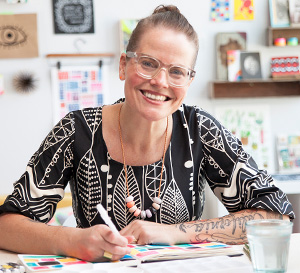
Let Your Faux Garden Grow
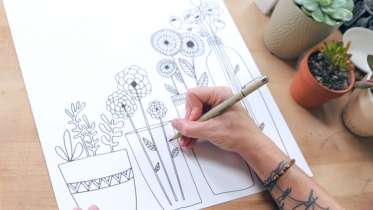
Basic Line Drawing: Flowers
Lisa Congdon
Learn basic stylized line drawing from one of today’s most sought-after illustrators, Lisa Congdon. Over this four-week course, Lisa covers the basics of line drawing, shows you how to build beautiful patterned drawings, and teaches fun projects for integrating line drawing into your repertoire. Whether you are just learning how to draw, or you want to deepen a regular creative practice, this class will fuel your imagination and show you how to create infinite designs from simple shapes.
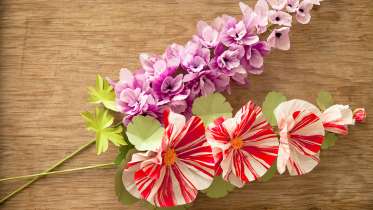
Paper Flowers: Make Hollyhocks and Delphiniums
Livia Cetti of The Green Vase
Learn how to make towering hollyhocks and delphiniums from paper – perfect for long-lasting, show-stopping arrangements. Before you start assembling the blooms, Livia teaches bleaching and hand-painting techniques that will give your petals realistic coloration and texture. From there, you’ll learn how to make the individual flowers and construct these stunning stems.
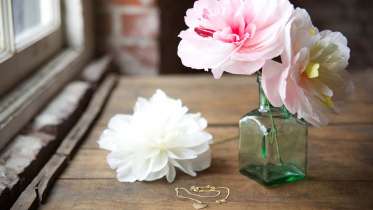
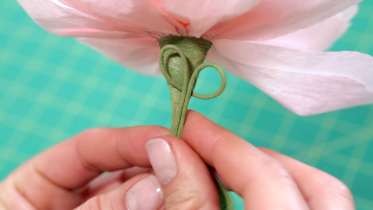
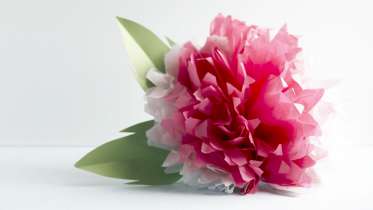
Paper Flowers: Make a Charm Peony Hair Clip
Livia Cetti of The Green Vase
In this class, paper flower artist Livia Cetti shares her technique for making everyone’s favorite flower: the peony. You will learn how to bleach the paper, cut out the petals, and put them all together to make a lush, realistic bloom. She then teaches you how to attach a hair clip to the bloom, making it a perfect long-lasting accessory – and a perfect way to enjoy this special bloom year-round.
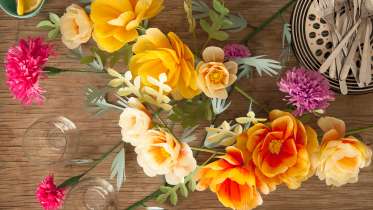
Paper Flowers: Make a Wild Rose and Thistle Centerpiece
Livia Cetti of The Green Vase
In this class, Livia shares her technique for making wild roses and thistles out of tissue paper. From dip-dye bleaching the paper to attaching the petals and leaves with floral tape, Livia covers every step of the paper-flower making process. She then shows you how to display the branches to make a gorgeous, organic tabletop centerpiece, perfect for weddings, parties, or any festive gathering.
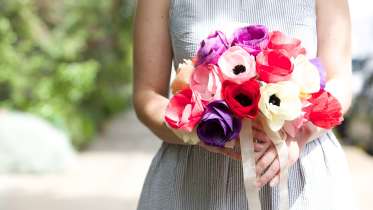
Paper Flowers: Make an Anemone Bouquet
Livia Cetti of The Green Vase
In this colorful class, Livia shares her expert technique for making anemones out of tissue paper. She begins with an overview of how to cut and dip-dye bleach the paper, and then shares how to pleat the petals and attach them to floral wire with floral tape. Once you’ve made a batch of flowers, Livia shares professional tips on how to arrange them by color and shape and put them together into a gorgeous wedding bouquet or tabletop arrangement.
Floral Tape Wrapping
Livia Cetti of The Green Vase
Learn proper floral tape wrapping techniques with paper flower artist, Livia Cetti. Useful for both paper and natural flower arrangements, this core technique will lay the foundation for creating stunning, smooth arrangements.
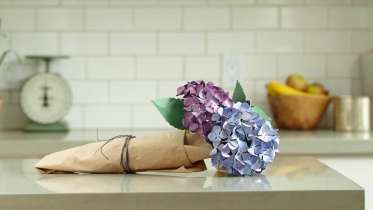
Cricut Paper Flowers: Make a Hydrangea
Lia Griffith
In this class, Lia shows how to make exquisitely detailed hydrangeas using a Cricut Explore machine. The Cricut is especially perfect for this project since you’ll need to cut out lots of small, intricate pieces of paper to make the flowers. Once your leaves and petals are cut out, Lia will show you how to assemble the hydrangea blooms on floral wire, adding dimension to each piece to create perfectly rounded 3-D branches
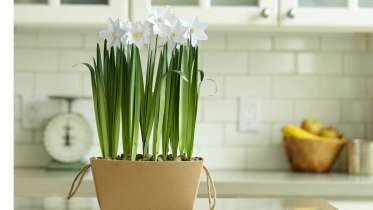
Cricut Paper Flowers: Make Potted Paperwhites
Lia Griffith
In this class, paper flower artist Lia Griffith shows how to create realistic paperwhites using the Cricut Explore cutting machine. Lia demonstrates how to use the scoring tool to create perfect creases in the flowers and leaves, and then shows how to assemble the blooms to make a stunning arrangement.
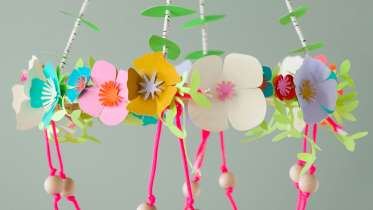
Cricut Crafts: Paper Flower Chandelier
Annabel Wrigley
Make this bright, fun chandelier alongside Annabel Wrigley from Little Pincushion Studio. In this class, Annabel teaches you how to cut out all of the individual flowers and vines using a Cricut Explore machine. Once the pieces are cut out, it’s a cinch to assemble the flowers with hot glue and string them on neon paracord. Add a few fun extra elements, like wooden beads and decorative straws, to finish off the look and add dimension.
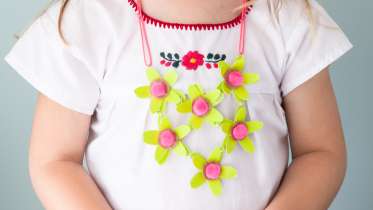
Kids Cricut Crafts: Paper Flower Necklace
Annabel Wrigley
In this class, Annabel Wrigley shows you how to make a cheerful paper flower necklace using Cricut Explore. Once the paper pieces are cut out, Annabel shows how easy it is to assemble the flowers, give them fringed details, add colorful pompoms centers, and how to link the flowers together to create a pretty necklace that fits your unique style.

Paper Wedding Crafts: Make a Flower Garland Backdrop
Lia Griffith
In Part 2, learn how to make this stunning floral backdrop for your big day. Bedecked with gorgeous paper blooms and leaves, this backdrop would work perfectly behind an altar or even as a festive photobooth. Lia shares clear step-by-step instruction for cutting out the paper petals and leaves, making the blooms, and creating the garlands. The ribbon garlands are tied on to a branch at the end, making it easy to customize the size of your backdrop to suit your space. This is an ideal project to make with friends—throw a craft party and you'll have a gorgeous hanging backdrop whipped up in no time!
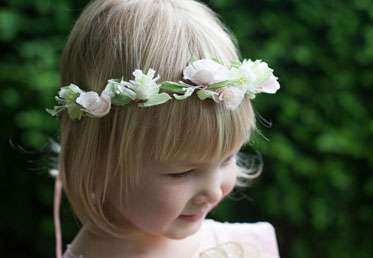
Paper Wedding Crafts: Create a Floral Head Wreath
Lia Griffith
In Part 1, Lia shares a classic wedding project—a floral head wreath perfect for a flower girl, bridesmaid, or even a bride. Lia will walk you through each step of the wreath-making process, from making the paper flowers and buds, to attaching them to the floral wire and finishing the ends with a pretty ribbon. Since the wreath is made from paper flowers, it will look great all day long and will last forever as a keepsake.
Make Tissue Paper Pompoms
Courtney Cerruti
Paper pompoms bring a colorful and textured floral touch to any celebration, especially weddings and parties. Courtney demonstrates how to create a gorgeous, oversized pompom from tissue paper, and also gives ideas for customizing color, shape and size.
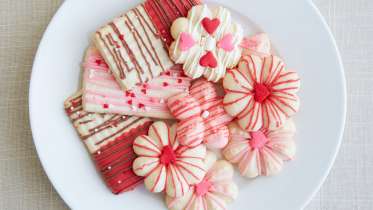
The Wilton Method®: Spritz Cookies
Wilton Instructors
Emily from Wilton shows you how to make buttery, bite-size spritz cookies from scratch—perfect for parties, holidays and special events all year round. You will learn how to make spritz dough in custom colors, and use the cookie press to create cookies in a variety of pretty shapes. Once the cookies are baked, Emily will share several creative ways to decorate them using sprinkles, sugar pearls and Candy Melts® Candy.
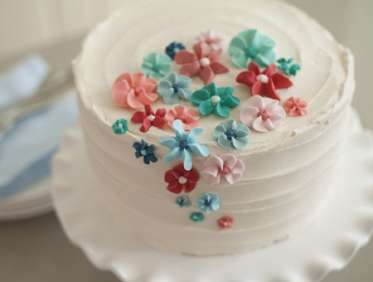
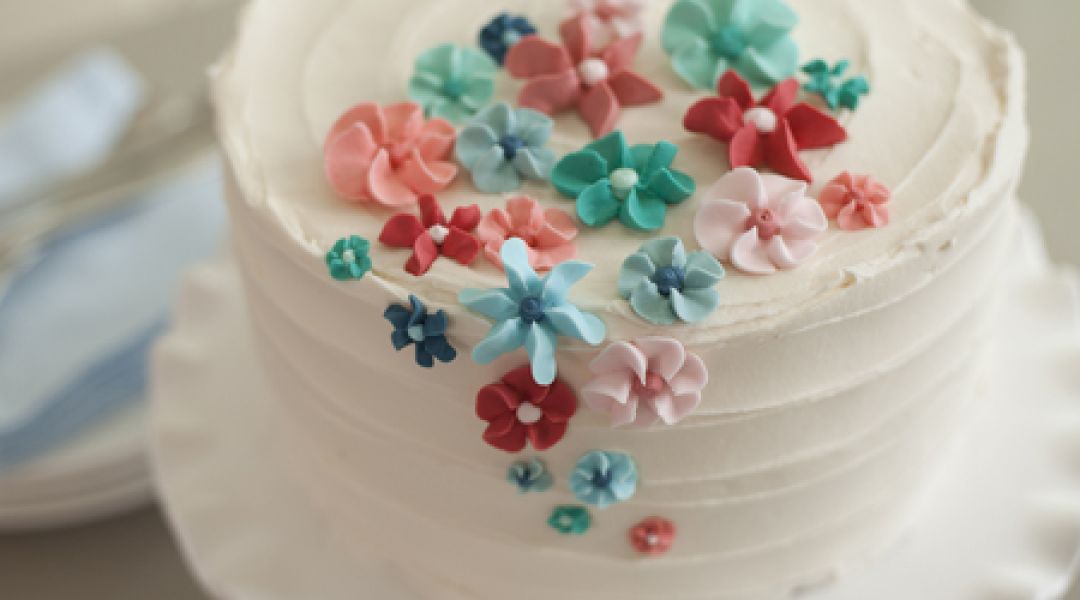
The Wilton Method of Cake Decorating: Easy Royal Icing Flower Cake
Wilton Instructors
In Part 4, you will learn how to make a show-stopping buttercream-iced cake, featuring royal icing drop flowers. Emily will show you how to make royal icing from scratch, mix colors to make a harmonious palette, and then use a variety of decorating tips to make flowers of different shapes, sizes, and hues. The surface of the cake is iced with a beautiful free-motion buttercream swirl, and then the drop flowers are grouped on top of the cake to create a stunning, organic arrangement.
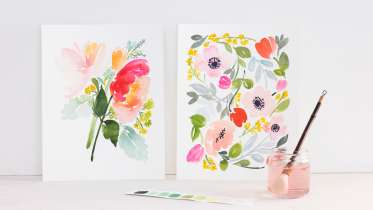
Intermediate Watercolor: A 2-Part Series
Yao Cheng
Once you’ve taken Yao’s Beginning Watercolor workshop, you’re ready to learn more complex techniques. Yao begins this two-part course by sharing her unique style of painting roses, tulips, peonies and more. In the second class, she focuses on layering techniques, showing how to use watercolor’s transparent qualities to create stunning abstract paintings and gestural landscapes. By the end of this skill-building course, you will have learned how to create finished paintings that are complex looking, but simple to make.
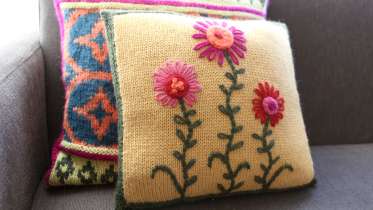
Embroidered Knit Pillow
Kristin Nicholas
This pillow is a great primer for anyone wanting to learn how to embroider onto knit surfaces. The knitting is simple – Kristin shows you a knit cast on and how to create a stockinette base with a garter stitch border. Next she’ll show you how to embroider the artwork onto the pillow with a spider web stitch, a chain stitch, the lazy daisy stitch and French knots. Once you have these stitches in your arsenal, you'll be able to come up with your own original embroidery designs that you can use to embellish all of your knitting.
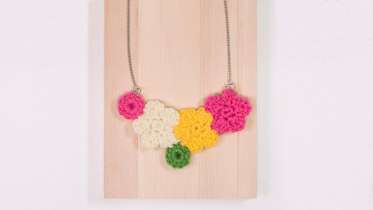
Crochet Flower Jewelry
Jenny Doh
In this workshop, Jenny will teach you how to crochet a scalloped flower, a five-petal flower, a small circle and a simple band. Stack the elements to make a cuff or a brooch. Or assemble the flowers and circles into a statement necklace. Jenny reviews every stitch you need in order to start whipping up these sweet and simple combinations.
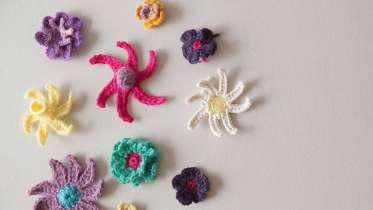
Crochet Flowers
Cal Patch
This workshop offers all the foundation skills you need to work up a whole bouquet of crocheted flowers. Superstar crochet instructor Cal Patch demonstrates three different center designs and five different petal styles so you can mix and match. Whether you like more frilly or structured flowers, you'll be ready to stitch up an entire bouquet's worth, ready to adorn hats, clothes, pillows – or anything that needs of touch of cozy charm.
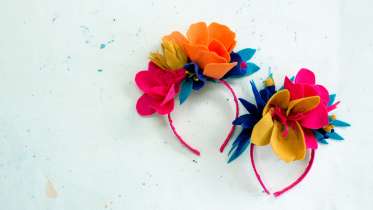
Frida Kahlo Inspired Headband
Courtney Cerruti
Frida Kahlo inspires us through her art, but her iconic flower headbands are pretty inspirational, too. Courtney demonstrates how to create a flower headband featuring custom-made felt flowers that pop. This piece is great for Halloween, Dia de los Muertos, Cinco de Mayo or any celebration that requires some bold, bright headwear.
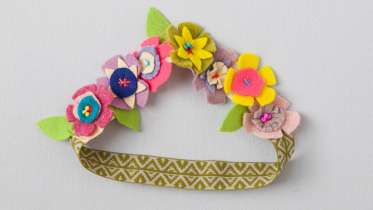
Felt Flower Headband
Annabel Wrigley
This pretty and sweet adornment adds a midsummer night's feel to any season. Working with felt in bright color combinations creates a wearable bouquet of plush happiness – but you can equally create a bracelet, garlands, or decorate the edge of a lampshade. Beads add texture to the bohemian feel of this project.
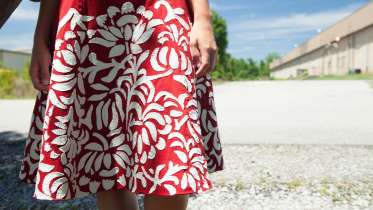
Traditional Appliqué
Natalie Chanin
Appliqué is a beautiful way to add texture, pattern and color to a project. Natalie uses appliqué to stunning effect in her Alabama Chanin collection, and in this workshop, she'll share with you her basic technique. She’ll also show examples of how using different stitches and thread result in dramatically different finished looks.
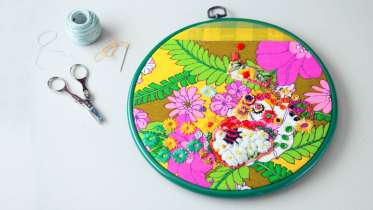
Layered Floral Embroidery
Rebecca Ringquist
Combine bright floral patterns and vintage embroidery to create a fabric collage bursting with texture and pattern. Rebecca shows how to create a loose, freeform style of embroidery where more is more. She demonstrates how to blend different fabric prints as a base, then add vintage trims and embroideries – and she teaches several floral stitch patterns that add density and dimension. Once you’re finished embroidering, hang your finished collage on a wall or incorporate it into a sewing project such as a pillow or bag that needs some cheer.
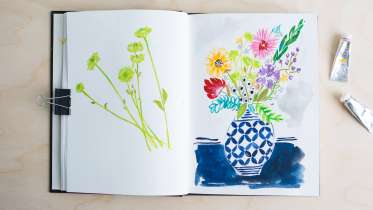
Illustrative Painting with Gouache: A 4-Part Series
Jennifer Orkin Lewis
Learn how Jennifer Orkin Lewis (also known as August Wren) uses gouache to create vibrant illustrations. Jennifer’s paintings are full of color and movement, and in this 3-part series, you’ll learn how to approach painting in her lively style. The class begins with a lesson on mixing colors and painting everyday objects. Once you’ve had a chance to practice your brushstrokes, you’ll learn how to paint florals and create stylized lettering.
Folk Flower Block
Anna Maria Parry
You don’t have to be an expert quilter to make this eye-catching quilt block. Modern quilter and fabric designer, Anna Maria Horner, shares how to create this folk-inspired flower block using floral print scraps. You will learn how to piece a background, fussy cut fabric, and reverse applique the flower and leaves using a sewing machine (no hand-stitching required). Make multiple Folk Flower blocks and piece them together however you’d like to make a quilt top that is blooming with color and texture.
Final Block Measures 12 ½” x 12 ½”
Final Block Measures 12 ½” x 12 ½”
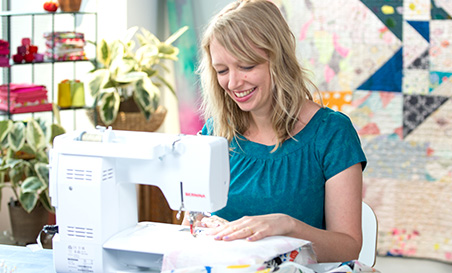
Learn Raw Edge Appliqué Quilting
Sue Nickels
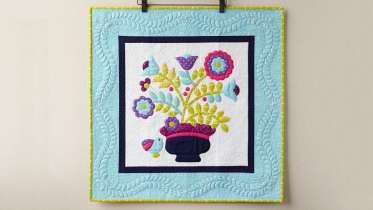
Learn all about raw edge machine appliqué with quilting expert, Sue Nickels. In this class, Sue shares her signature technique for assembling a vibrant, floral appliqué quilt top. Each piece of appliqué uses just a bit of fusible web to keep it in place, and is then secured permanently with machine blanket stitching. You will learn how to stitch inner and outer points as well as curves and circles, complex units, and bias stems. This class will teach you everything you need to know to work any machine-appliqué pattern, large or small.
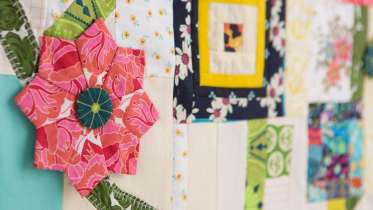
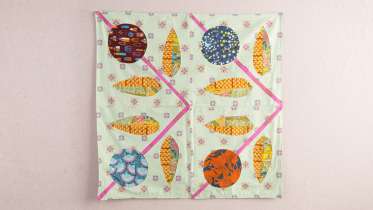
Mod Corsage Quilts with Anna Maria Horner
Anna Maria Parry
Learn how to combine existing patchwork pieces and fussy cut floral fabrics to create stunning floral bouquet blocks. Inspired by 17th century Broderie Perse (Persian embroidery) quilting, Anna Maria Horner shows you how to create a modern interpretation of a "trompe l'oeil" bouquet using improvisational patchwork and applique. The architectural line work of this modern block is softened by the organic floral motifs, giving it a balanced and fresh look. “Mod Corsage” is perfect for anyone with patchwork experience who is looking to experiment with composition and color.
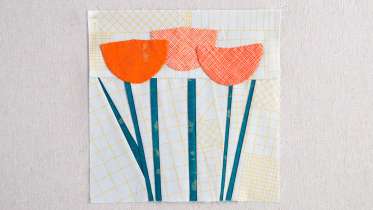
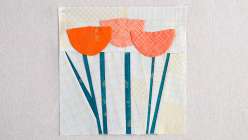
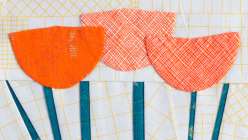
Minna Block
Carolyn Friedlander
Combine linear paper piecing and applique techniques to create a lovely, layered block featuring vibrant blooms. Modern quilter Carolyn Friedlander teaches you how to paper piece a background layer, remove the paper easily, and then applique curved flower petal shapes on top.

Taught by Carolyn Friedlander
Start Free Trial or
Buy For $19.95
Combine linear paper piecing and applique techniques to create a lovely, layered block featuring vibrant blooms. Modern quilter Carolyn Friedlander teaches you how to paper piece a background layer, remove the paper easily, and then applique curved flower petal shapes on top.
Learn how to:
Here’s what you’ll need:
Finished Size: Square is 7 1/2” x 7 1/2”
- Background template printed on paper
- Bloom template printed on paper or template plastic
- Sewing machine
- Table extension for sewing machine (optional)
- Quilting needle for machine
- 50wt cotton thread in three colors: a neutral color for machine piecing, and colors to match and contrast applique
- Seam gauge
- Thread conditioner (optional)
- Rotary cutter
- Cutting mat
- Quilting ruler
- Iron
- Ironing surface
- Sharp snips
- Applique pins
- Hand-applique needle
- Quilting cotton fabrics:
- 1” wide green strips for stems
- 3¼” wide strips for background
- 5” scraps for appliques in desired colors and patterns
Downloads:
- Create a linear background with paper piecing
- Remove paper
- Trace applique designs
- Baste applique pieces onto background
- Applique pieces
- Step-by-step expert instruction on how to combine techniques to create a lovely, layered block
- 1 HD video lesson you can access online anytime, anywhere
- Detailed supplies list and a downloadable PDF template ($16 value)
- The ability to leave comments, ask questions, and interact with other students

Member Gallery
Browse members' projects from this class and share your own work! Learn how to take great photos here.
Load More
Minna Block Reviews
30 users recommended this class to a friend

Barbys Bakery
Great course! Very detailed! I like the way the instructor demonstrated step by step.
More than 3 months ago

Lorraine McAdams
Instructor is FABULOUS!! She explains all so well....LOVE her tips!!
More than 3 months ago
basheera perry
Very easy for beginners
More than 3 months ago
Related Classes