
Volume 90%
Press shift question mark to access a list of keyboard shortcuts
Keyboard Shortcuts
Play/PauseSPACE
Increase Volume↑
Decrease Volume↓
Seek Forward→
Seek Backward←
Captions On/Offc
Fullscreen/Exit Fullscreenf
Mute/Unmutem
Seek %0-9

CBTV
|
1 min 1 sec
|
01:01
|
January Lookbook // 2019
January Lookbook // 2019
CBTV
What will you make this January? Watch this quick promo to get a sneak peek of our all-new releases and seasonal favorites. Click here to watch all of the classes shown in the promo.
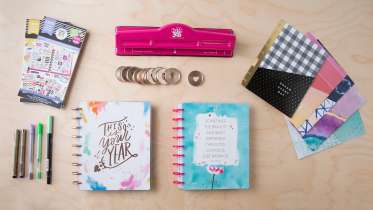
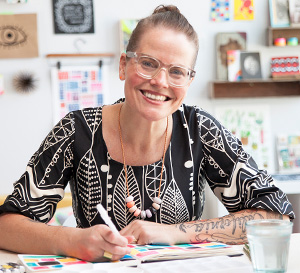
Planners 101: Creative Ideas for Choosing and Using a Planner
Stephanie Fleming
Happy Planner founder, Stephanie Fleming, provides a thorough introduction to the exciting world of planners, sharing a wealth of knowledge on how to plan your happy life. This class will not only help you choose your planner, but will also help you decide how you want to customize and embellish it. Stephanie shows you how to add pages, punch photographs, embellish with stickers and pens, and exercise your creativity – all while staying on task. As Stephanie says, “I want this class to feel like a guided meditation – let me walk you through the process.”

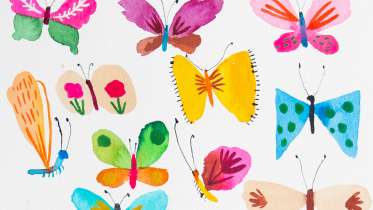
Daily Painting Challenge: Flowers, Fruits and the Natural World
Carolyn Gavin
Join artist and illustrator Carolyn Gavin for a month of exploring color. Using both gouache and watercolor, Carolyn will demonstrate how she works from reference and imagination to create her paintings. She begins the daily challenge with her signature florals, then works through the month using fruits, veggies, and household objects as subjects. You’ll experiment with shape and color and learn how to let inspiration guide you along your painting journey. Finish your paintings by adding detail with pen and ink to create a month of beautifully rich paintings.

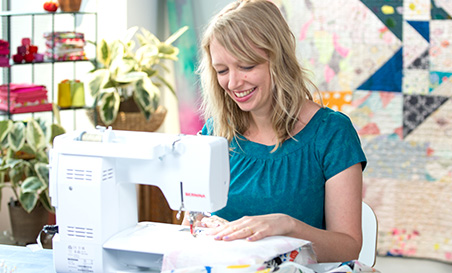
Lingerie Sewing: Underwire Bralette and Ruffle Panty
Madalynne Intimates
The pairing of Simplicity and Madalynne Intimates is a match made in lingerie heaven. Designer Maddie Flanigan uses the Simplicity 8711 pattern to show you step by step how to sew a gorgeous set of intimates. The underwire bralette features a monowire for support, housed in an interior frame called a floating bridge. The monowire and bust darts create a bralette that gives exceptional support and shapes without flattening. You’ll also learn how to attach a hook and eye closure and make adjustable elastic shoulder straps. The underwear is sewn in a matching fabric with three tiers of flounces for a glamorous effect.
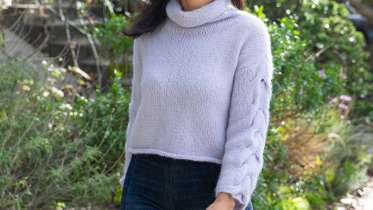
Knit the Lady Soul Sweater
Wool And The Gang
Cool and classic, simple and sophisticated, the Lady Soul Sweater is a fabulous quick knit. Featuring minimal shaping and an intriguing cable running up both arms, this sweater comes together in a snap using large needles and fluffy yarn. Lucy from Wool And The Gang walks you through casting on, working the cable, seaming the sweater, and picking up stitches to create a luscious funnel neck. The slightly cropped fit is oh-so-chic and can be easily extended by knitting a few extra rows.
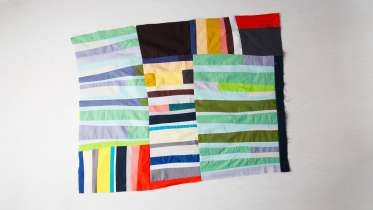
Patchwork Improv: Working with Strips
Sherri Lynn Wood
For textile artist Sherri Lynn Wood, improvisation is a way to make choices in all aspects of daily living, but especially in her patchwork process. In this class, Sherri demonstrates the freedom and excitement of improv patchwork by focusing on string piecing. Working within a "score" or flexible pattern, you’ll learn how to work with surprises, make choices from random selections, celebrate “whoopie” moments, and troubleshoot in the moment. By the end you’ll have a beautiful piece of patchwork that can be further developed into a quilt or used as a decorative piece.

Sew a Linen Bucket Bag
Elke Bergeron
Create your own linen and leather bag with the expert guidance of Elke Bergeron. Elke shows you how to sew a classic bucket bag, plus she shows you how to make a beautiful leather shoulder strap and a coordinating leather tassel. This class provides a foundation in basic sewing and leather-working skills, and results in a gorgeous handbag, perfect for year-round use.
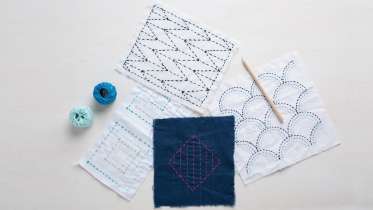
Sashiko Sewing
Lisa Solomon
Learn how one stitch can provide you with inspiration for a lifetime of creative practice. Using the running stitch as a base, mixed media artist Lisa Solomon shows you the Japanese tradition of sashiko stitching as well as a plethora of ideas for creative and practical use. You’ll learn how to work with traditional patterns (or make your own designs based on a grid layout) to make decorative pieces or mend and patch garments. No matter the method you choose, you’ll find that sashiko is a great way to slow down and stitch with intention, creating beauty from simplicity.
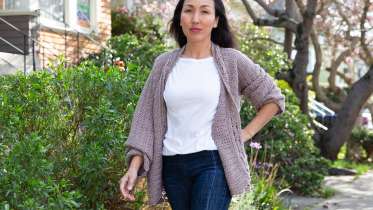
Super Slouch Crocheted Cardigan
Marly Bird
If you’re comfortable wielding a hook but have never attempted a crocheted garment, look no further than the Super Slouch Crocheted Cardigan. Marly Bird, proud Red Heart spokesperson and expert knitter and crocheter, coaches you through this oversized cardigan that’s simple to make and cozy to wear. The cardigan is worked in one piece beginning with a double crochet and a simple shell stitch for a pop of texture on the back. Stitches are then cast on for the sleeves, and the front is worked as two separate panels before attaching a shawl collar that repeats the shell motif. Class includes a downloadable pattern PDF in sizes XS (36" bust) to 3XL (63" bust).
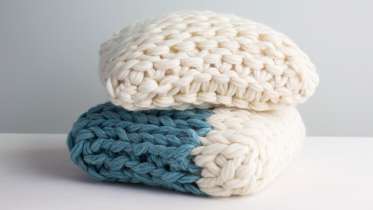
Arm Knitting: Make a Throw Pillow
Anne Weil
Arm knitting is a simple process that yields luxurious results. Using super bulky yarn, knit designer Anne Weil shows you how to create a color-blocked pillow cover. As a finishing touch, you will also learn how to sew a simple pillow lining. This plush pillow can be made in a day and enjoyed year round.
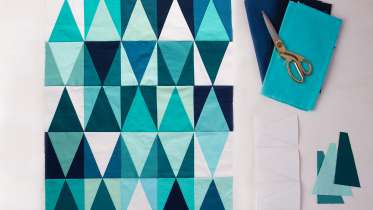
Freezer Paper Piecing
Tara Faughnan
Colorful quilter Tara Faughnan shares her technique for piecing geometric quilts with freezer paper templates. This technique creates super precise points and makes piecing a breeze – and best of all, the templates can be used over and over again. Along the way, Tara shares her knowledge of choosing fabrics based on color value and interaction, and then goes on to show how to create your own templates. After that, it’s time to piece! Tara demonstrates how to make a diamond-themed mini quilt, but this technique can be applied to quilts of all shapes and sizes.
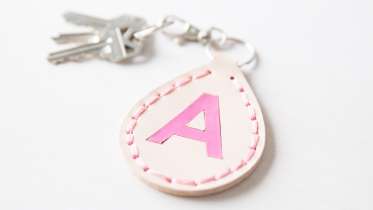
Cricut Crafts: Monogrammed Leather Keychain
Amber of Damask Love
Learn how to make a professional looking custom leather keychain using the Cricut Maker. Amber from Damask Love shows how easy it is to use the Cricut Design Space to create your layout. She then shows how to cut out precise leather shapes on your Cricut Maker and assemble the keychain with embroidery floss and leather glue. This quick and stylish project is perfect for anyone learning how to work with leather on their Cricut machine.
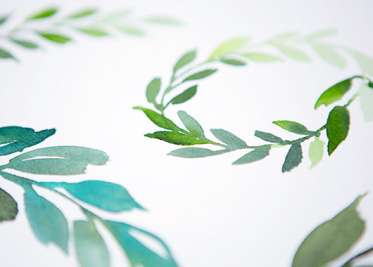
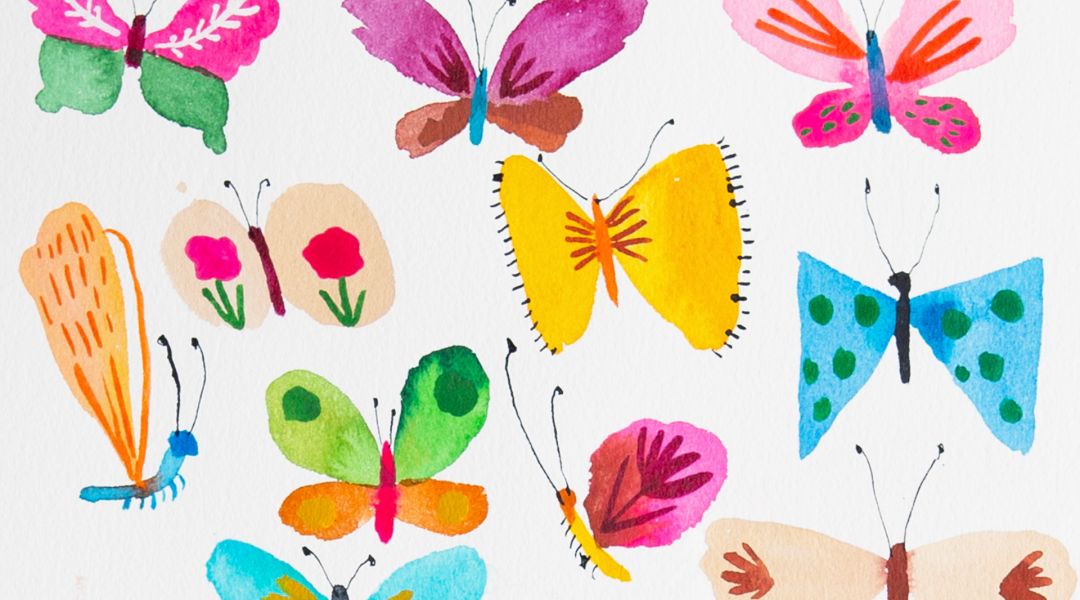
Beginning Watercolor: Mark-Making and Expressive Brush Strokes
Yao Cheng
Now that you’ve had a chance to play with color and basic techniques, you’re ready to get to know your paintbrushes. This class is all about exploring the effects you can achieve with different brushes and strokes. To practice these techniques, Yao will show you several ways to paint trees and leaves, and at the end she’ll show you how to paint simple wreaths full of greenery.
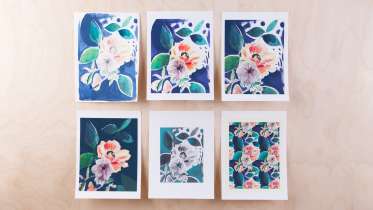
Digitizing Watercolor: Creating Art Prints in Photoshop
Cecelia Murphy
Learn how to take that painting out of your sketchbook and turn it into a reproducible art print! Designer and artist, Cecelia Murphy, shows you her technique for scanning artwork, touching it up in Photoshop, and transforming it into a giclee print. This fine art printing format allows you to create high-quality multiples of your artwork, perfect for selling on Etsy or at craft fairs. Perfect for Photoshop first-timers, Cecelia shows you how to use your painting as a jumping off point to enhance color, achieve brighter whites and even add digital paint brush strokes to improve and stylize your painting. This digitizing technique is ideal for watercolor artists, but also works well with artwork made in other mediums.
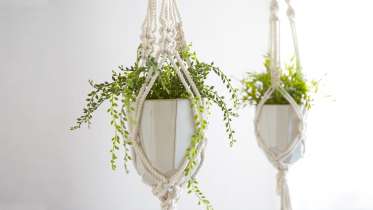
Make a Classic Macramé Plant Hanger
Emily Katz
Learn how to create the most iconic of all macramé projects: the Plant Hanger. Emily Katz shows you how to create a hanger out of cotton rope tied into simple square knots and half square knots. This project is totally customizable and can work with planters of any size. Emily will show you how to calculate the proportions of your planter and construct a hanger that will hold the pot perfectly.
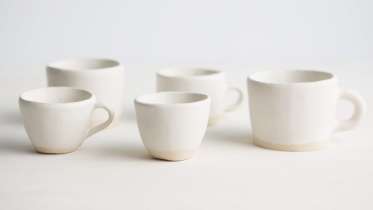
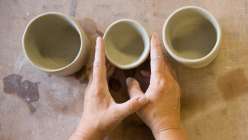
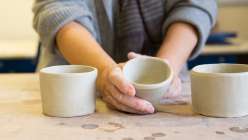
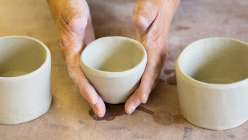
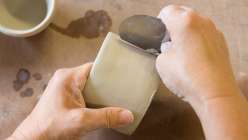
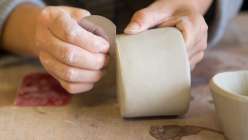
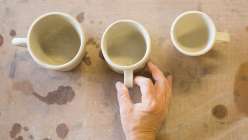
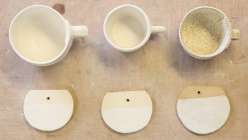
Hand-Built Ceramics: A 3-Part Series
Linda Fahey
Learn how to create beautiful ceramic vessels at home without a potter's wheel. California ceramicist and designer Linda Fahey shows you every step of setting up a studio at home, and then demonstrates three methods for hand-building pottery. Along the way, she covers creating and attaching handles and even provides an introduction to glazing and firing. This three-part course covers all of the essential information you need to know to play with clay in your home studio.

Taught by Linda Fahey
Start Free Trial or
Buy For $29.95
Learn how to create beautiful ceramic vessels at home without a potter's wheel. California ceramicist and designer Linda Fahey shows you every step of setting up a studio at home, and then demonstrates three methods for hand-building pottery. Along the way, she covers creating and attaching handles and even provides an introduction to glazing and firing. This three-part course covers all of the essential information you need to know to play with clay in your home studio.
25lb bag of clay (Linda suggests B-Mix cone 5/6 midfire with sand) Sponge Wire tool 3 ribs (serrated, non-serrated, and rubber) Dust mask Small utility knife Scraping tool Smoothing tool Rasp Rolling pin or PVC pipe Thin sheets of plastic (dry-cleaning plastic is ideal) Spray bottle Sealable containers with lids Two ¼” wooden dowels Wet towel 3" biscuit cutter Rinse bucket Small slip brush Apron (optional) Cup forms at “leather hard” stage Wedged clay for handles Sponge Sheets of plastic and a storage box Handled blending tool Scoring tool Small wallpaper roller Utility knife Slip Paintbrush Glazing grips Wax Sponge Haka brush Glaze (in a bucket) for dipping (Linda uses Cone 5 satin white)
Learn how to:
What you’ll get:
Here’s what you’ll need:
Hand-Built Ceramics: Pinch Pot, Slab, and Coil Forms
Hand-Built Ceramics: Creating and Attaching Handles
Hand-Built Ceramics: Introduction to Glazing
Downloads:
- Create beautiful ceramic vessels
- Setting up a studio at home
- Three methods for hand-building pottery
What you’ll get:
- Step-by-step expert instruction from Linda Fahey on hand-built ceramics
- A multi-part video lesson you can access online anytime, anywhere
- Detailed supplies list
- The ability to leave comments, ask questions, and interact with other students


Member Gallery
Browse members' projects from this class and share your own work! Learn how to take great photos here.
Load More
Hand-Built Ceramics: A 3-Part Series Reviews
150 users recommended this class to a friend

Nancy France
This looks fun!
More than 3 months ago

m...@gmail.com
This promo is neat. I am working on an Android Smart Phone at the moment but will do most classes on a full PC. This is a learning experience just to use this format.
More than 3 months ago
Pamela Aucoin
Information about classes
More than 3 months ago
Related Classes