

Beginner
|
4 min 47 sec
|
04:47
|
Courtney's Favorite Classes
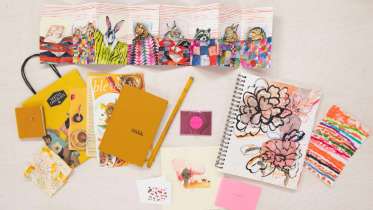
Find Your Creative Rhythm: 15 Ways to Spark & Sustain Art Making
Courtney Cerruti
When you are a creative person but you feel like you can't access that part of yourself, how do you re-engage with your creativity and keep it going? At one time or another all of us experience lulls in our creativity and reconnecting when you feel blocked can be challenging, but artist, author and Creativebug Editor-in-Chief, Courtney Cerruti, is here to share her tried and true approaches in sparking and sustaining creative practice. Start with small steps: make space for new experiences, embrace playful practices, and engage with inspiring books and people. Courtney's prompts overlap and spill into each other—take them as they are or adapt them to fit your style as they ignite your creativity, slowly building into a fully fueled fire of artistic thought and action. Remember that creativity is a journey, and each person's path to reconnection is unique.
This 15-day practice will release every other day this month.
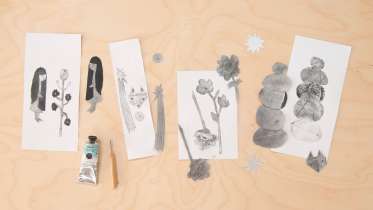
Tetra Pak Printing
Courtney Cerruti
Unlock the potential of everyday materials by transforming food packaging into printmaking plates that yield beautiful, accessible results. Courtney Cerruti, artist and Creativebug Editor-In-Chief, fell in love with this technique because it is similar to etching on metal plates but has a convenient twist—the materials you’ll use are recycled, readily available, and easy to work with. This approach encourages free and spontaneous exploration, without the worry of “ruining a plate.” In this class, learn how to upcycle a TetraPak into a printing plate, create abstract images from organic shapes, etch prints by drawing directly onto the surface, and cut away spaces that will print in black. This sustainable method offers a creative and attainable way to dive into printmaking.

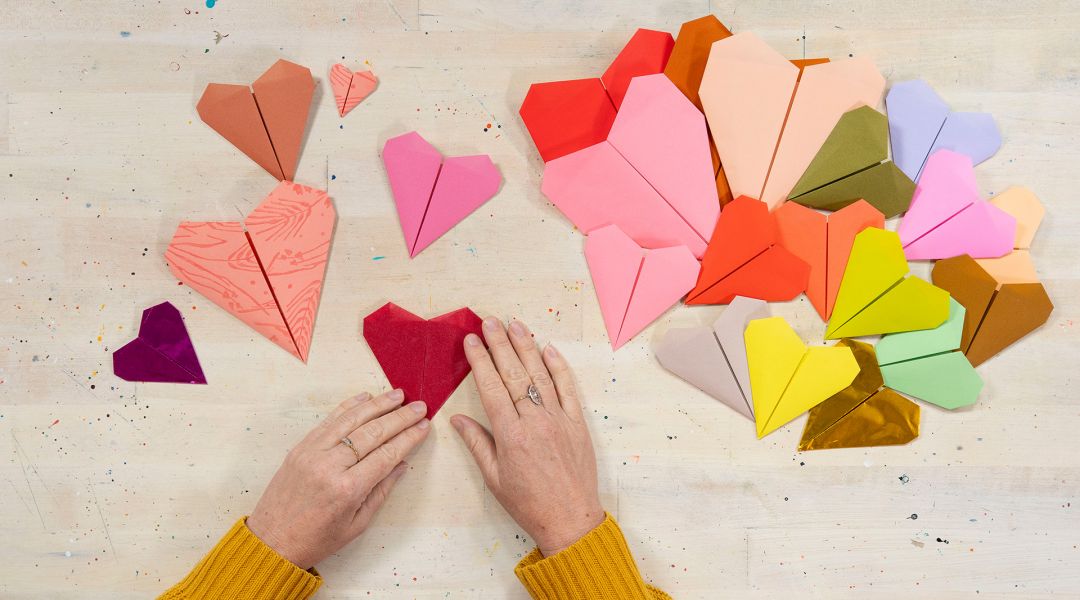
How to Fold an Origami Heart
Courtney Cerruti
Hearts can symbolize strong emotions such as love, strength, and happiness. Artitst Courtney Cerruti shares how easy it is to fold an origami heart. Even if you've never folded paper like this before, your origami self-confidence will go up the charts with this very easy piece. Make it for Valentines, Mother's Day, or any occasion to share some love.
Playing with Image Transfers: A Daily Practice
Courtney Cerruti
The art of image transfers is ethereal, subtle, and surprising—lingering between painterly and photographic, yet completely distinct. Author and artist, Courtney Cerruti leads you through experimentation with various transfer techniques on paper and fabric, layering them onto a foundational cloth to create a unique piece. Inspired by a theme and driven by curiosity, you'll blend language and imagery to craft a story, adding embellishments with found objects and threads. Gather images, words, and phrases from literature or any sources that inspire you, then select materials that resonate with your creative vision. Without a strict plan, the process unfolds organically, with each piece surprising and delighting in its own way.
Want to learn more image transfer techniques? Check out Courtney's other Image Transfers and Color Image Transfers on Wood classes!
Want to learn more image transfer techniques? Check out Courtney's other Image Transfers and Color Image Transfers on Wood classes!
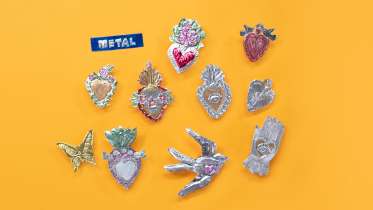
Decorative Metal Embossing
Mia Semingson of Two Hands Paperie
Learn how to emboss metal with artist Mia Semingson of Two Hands Paperie. Inspired by traditional Mexican tin art, Mia shows you how transformative and flexible metal can be - you can even use the metal from a tube of tomato paste or paint. She begins by demonstrating how to transfer a paper template to thin metal sheet, then learn how to push and pull the metal to create embossed textures and designs with tools you might already have on hand. Find out how to paint your metal projects with alcohol ink to add touches of color. Start with a metal test strip to experiment with your tools and paints, and then Mia will guide you through three different projects: a low-relief ornament with an image of a hand, a sacred heart which includes layered pieces with lots of dimension, and a high-relief embossed box lid which is a wonderful opportunity for upcycling.
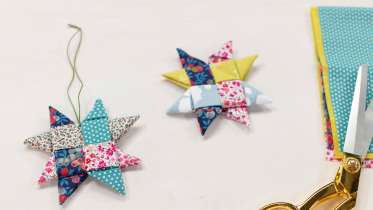
Woven Fabric Star Ornament
Faith Hale
The most fun puzzle you'll construct all holiday season, these cute ornaments are made out of scraps of fabric or even bias tape. Artist and ornament enthusiast Faith Hale talks you through preparing your fabric for folding, constructing the woven star, and then adding a tie for hanging. They're irresistable to make and cute as can be and you'll want to make a dozen.
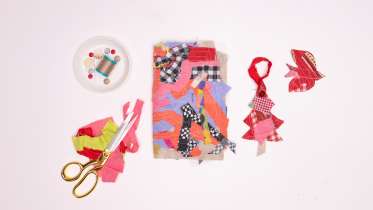
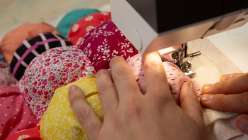
Fabric Scrap Ornaments
Courtney Cerruti
If you're an avid sewist, your sewing table and floor are likely littered with little bits of fabric and thread. Artist and crafter extraordinaire Courtney Cerruti shows you how to use those tiny trimmings to create a new sheet of "scrap fabric" that can be turned into patchwork-like ornaments for any celebration. Ideal for a holiday tree, a tablescape, or adorning a package, these ornaments are a charming way to use up every last bit your very favorite fabric.
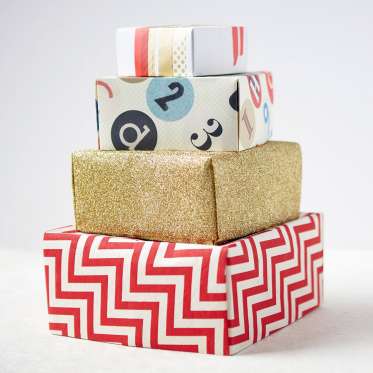
How to Fold a Paper Box
Liana Allday
Create custom-sized boxes using decorative paper with Liana from Creativebug. These pretty paper boxes have their roots in origami, coming together with a series of simple folds. You'll learn how to make box tops with matching bottoms, which make cute gift containers for any occasion.
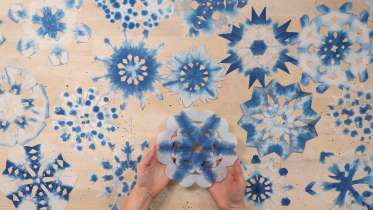
Make Shibori-Inspired Paper Snowflakes
Mia Semingson of Two Hands Paperie
Bring back the nostalgic joy of making the paper snowflakes from your childhood and elevate them with a shibori-inspired dip dye. Mia Semingson is an artist, book binder, and owner of Two Hands Paperie in Boulder, Colorado. She is always looking for creative new ways to express her love of paper, so she combined a familiar snowflake project with a dyeing technique reminiscent of indigo patterns on Japanese resist-dyed fabric. Learn how to fold and cut Japanese washi paper as well as basket-style coffee filters and then play with dye to make decorative, sophisticated snowflakes that are truly one of a kind and a surprise to reveal. Hang individiually as ornaments or hang them together as a beautiful garland.
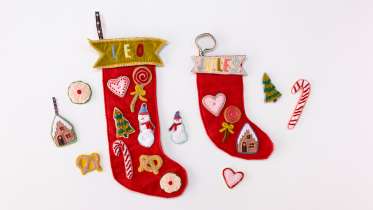
12 Days of Christmas: Sew an Heirloom Stocking
Rebecca Ringquist
On the first day of Christmas, give yourself the gift of crafting a beautiful heirloom stocking. Constructed by cutting out and layering wool felt shapes, Portland-based artist Rebecca Ringquist brings to life a collection of charming little holiday motifs that add color and sparkle to your holiday gift giving. From candy canes to sugar cookies, infuse personal touches by adding embroidery, sequins and beads, and then top your stocking with a custom name tag and ribbon for hanging. Creating an heirloom is not a fast project but one you and your family will cherish for generations.
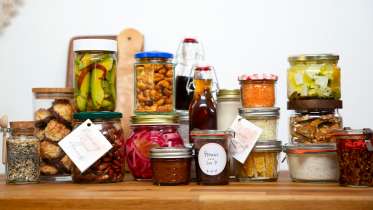
From My Kitchen to Yours: A Month of Giftable Goods & Recipes
Cobrina
This year, don't miss this opportunity to bestow the gift of deliciousness upon your loved ones. Starting with quality ingredients and leveraging a few expert tips, Cobrina of Creativebug demystifies the creation of various costly items that can be effortlessly crafted within the comfort of your own kitchen. Fancy infused salts, decadent compound butters, and handmade candies are just a taste of what you'll learn, and as an added bonus, we have included a set of downloadable recipe cards and gift tags, enabling you to present your culinary creations with a polished and professional touch. Whether you desire a single exquisite item as a thoughtful host gift (or a treat for yourself) or a generous batch to distribute among friends and neighbors, these recipes are tailor-made for gifting and entertaining.
Shelf-life and suggested uses for every recipe are listed on the gift tags in the PDF.
Shelf-life and suggested uses for every recipe are listed on the gift tags in the PDF.
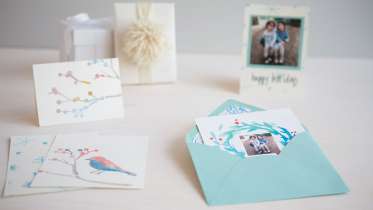
How to Make Watercolor Cards
Courtney Cerruti
Learn how to make simple watercolor cards that you’ll enjoy making just as much as your friends and family will enjoy receiving. Courtney Cerruti demonstrates how to create elegant motifs using watercolor and simple brushstrokes or how to use a stencil to apply watercolor if you feel intimidated by the medium. Learn how to personalize your cards with a family photo and make photocopies to create an entire set of handmade cards. Finally, add that same personal touch to your envelopes by making an envelope liner using the same photocopied watercolor technique.
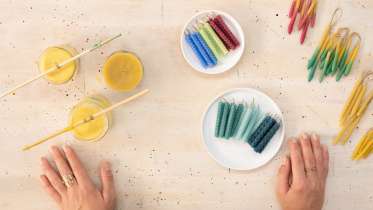
Make Beeswax Celebration Candles
Cobrina
The soft light of a candle has a way of setting up an idyllic atmosphere for celebration or contemplation. That feeling is even more profound when the glow of that candle is one you have made yourself. This class covers three variations of small, handmade beeswax candles. Cobrina of Creativebug demonstrates how to roll celebration candles from sheet beeswax, some best for sticking in a cupcake and others for a candleholder, such as a menorah. Next, learn how to melt beeswax and dip small double-sided tapers layered with colors from a crayon. If you choose to make both candle types, you can then use the leftovers to make a votive.
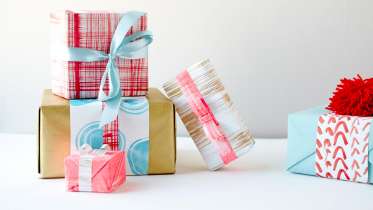
DIY Painted Gift Wrap
Courtney Cerruti
In one afternoon, you can create enough painted paper to wrap gifts for any occasion. Courtney Cerruti teaches several quick and easy dry-brush techniques, from sophisticated crosshatch designs to loose geometric squiggles – no prior painting experience required. At the very end, Courtney shares unique ideas for mixing and matching papers to wrap any gift.

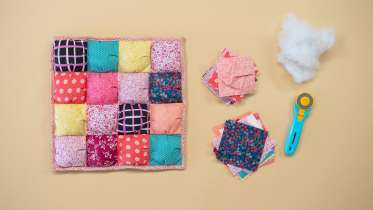
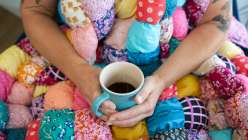
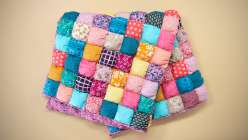
Sew a Puff Quilt
Faith Hale
Whether you call it a puff quilt or a biscuit quilt, this particular patchwork method provides maximum coziness and charm. Artist and quilter Faith Hale has explored the myriad methods of piecing, stuffing, quilting and binding this vintage-inspired quilt, and she walks you through her favorite methods, along with a few variations. First learn how to sew the puffs and assemble them together into a top, then decide whether you want to use bar tacks, machine-sewn lines, or hand ties to quilt it all together. In this class Faith demonstrates how to make a 14" square that can easily be enlarged to make lap or even bed-sized quilts right out of a story book.

Taught by Faith Hale
Start Free Trial or
Buy For $19.95
Whether you call it a puff quilt or a biscuit quilt, this particular patchwork method provides maximum coziness and charm. Artist and quilter Faith Hale has explored the myriad methods of piecing, stuffing, quilting and binding this vintage-inspired quilt, and she walks you through her favorite methods, along with a few variations. First learn how to sew the puffs and assemble them together into a top, then decide whether you want to use bar tacks, machine-sewn lines, or hand ties to quilt it all together. In this class Faith demonstrates how to make a 14" square that can easily be enlarged to make lap or even bed-sized quilts right out of a story book.
Learn how to:
Here’s what you’ll need:
- Sewing machine
- Quilting ruler
- Scissors or rotary cutter and cutting mat
- Safety pins for basting
- Clips for binding
- Tapestry wool and sharp tapestry needle for ties
- Neutral polyester thread
- Quilting foot or 1/4" foot
- Zipper foot (optional)
- To make a 14" square you will need:
- 16 pieces 4.5" patchwork fabric
- 16 pieces 4" puff backing fabric (this won't be visible)
- One 16" square lightweight batting
- One 18" square of backing fabric (this will be visible on back of quilt)
- 1.5-3.5oz Polyfil stuffing
- For a throw-sized blanket measuring 52 x 60”, arrange your puffs in 15 rows of 13 puffs (195 puffs needed, plus 52 x 60" batting and 54 x 62" backing fabric )
- For a twin comforter measuring 68 x 88”, arrange your puffs in 22 rows of 17 puffs (308 completed puffs needed, plus 68 x 88" batting and 70 x 90" backing fabric)
- For a full comforter measuring 80 x 88”, arrange your puffs in 22 rows of 20 puffs (440 completed puffs needed, plus 80 x 88" batting and 82 x 90" backing fabric)
- Larger sizes will be difficult on a standard-sized sewing machine - proceed at your own risk!
Downloads:
- Sew and stuff a puff
- Assemble a puff quilt sandwich
- Quilt using a stitch-in-the-ditch method
- Quilt using hand ties
- Sew a self binding

Member Gallery
Browse members' projects from this class and share your own work! Learn how to take great photos here.
Load More
Transcript
Class PDF
Sew a Puff Quilt Reviews
118 users recommended this class to a friend

Sarah Love
I loved it !!!!!!!!!!!!!!!!!!!!!!!!!!!!!!!!!!!!!!!!!!!!!!!!!!!!!!!!!!!!!!!!!!!!!!!!!!!!!!!!!!!!!!!!!!!!!!!!!!!
!!!!!!!!!!!!!!!!!!!!!!!!!!!!!!!!!!!!!!!!!!!!!!!!!!!!!!!!!!!!
- Willow
September 30, 2025
Gurpreet Kaur
fantastic start for kids to learn!
September 24, 2025
Angie Baugher
Nice and simple pattern to learn and use in many ways.
September 24, 2025
Related Classes