
Intermediate
|
1 hour 27 min
|
00:57
|
|
01:38
|
|
03:32
|
|
21:07
|
|
11:02
|
|
00:27
|
|
01:07
|
|
05:40
|
|
21:52
|
|
08:18
|
|
12:03
|

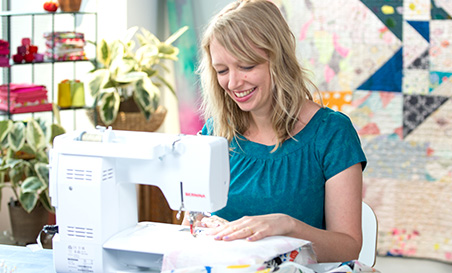
Taught by Carolyn Friedlander
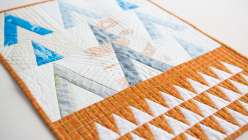
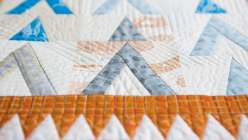
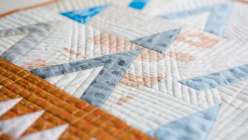
Explore the time-honored tradition of paper-pieced quilting with Carolyn Friedlander. In this two-part class, Carolyn guides you through her process of designing a paper-pieced quilt from beginning to end. Not only will you see how she turns sketches into schematics for paper piecing, but you’ll also learn Carolyn’s techniques for quilting using free-motion and straight-stitching techniques. This fresh take on paper piecing equips you with the knowledge you need to take your skills to the next level.
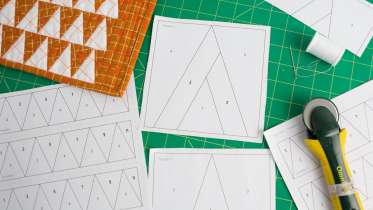
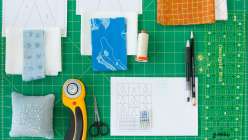
1 1/2 yards of patterned quilting cotton in an assortment of light and dark colors (fabrics shown are Carolyn Friedlander fabrics from her "Doe" and "Carkai" lines) (3/4 yard light and 3/4 yard dark fabric) PDF templates printed out (5 of Block A, 4 of Block B, 6 of Block C) Quilting needles (90/14) Quilting pins Sewing machine Sewing machine foot with good visibility of sewing area Extension table (optional) Matching thread Sharp scissors Rotary cutter Quilting ruler Self-healing cutting mat Finished measurements
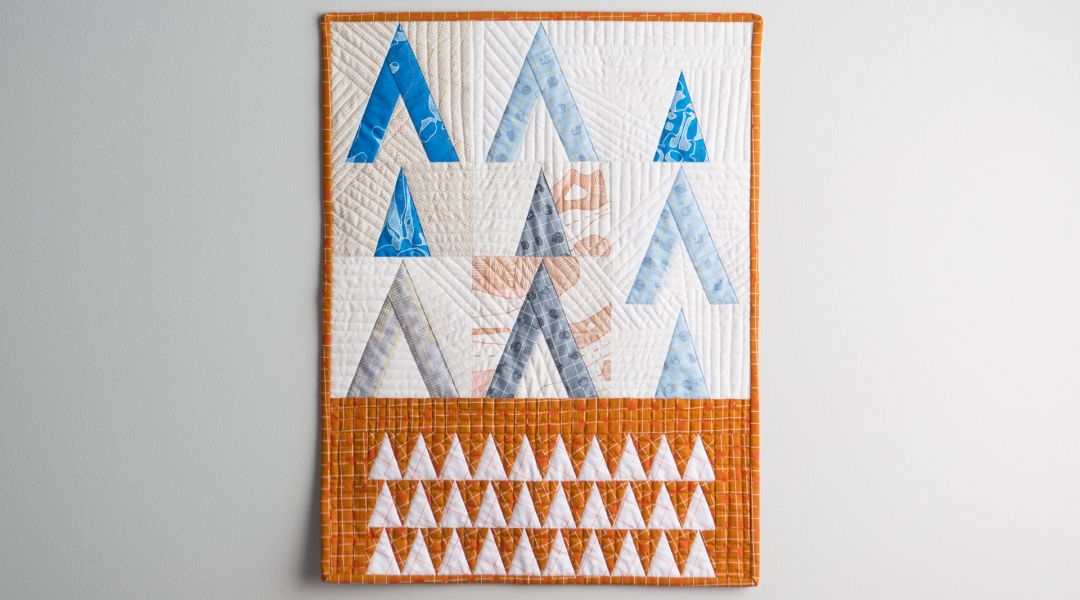
Block A = 6” square (make 5 blocks total)
Block B = 4” x 6” (make 4 blocks total)
Block C = 2” x 7 1/2” (make 6 blocks total)
Finished quilt top Backing fabric (approximately 30” x 24”) Cotton Batting (approximately 30” x 24”) Curved or Quilters safety pins Clover clips Sewing machine Walking foot Darning foot Table extension for sewing machine (optional) Fresh quilting needles (90/14) Quilting gloves Iron and ironing surface Binding fabric - three pieces cut to 2 ¼” wide by approximately 40” long (or width of fabric) Hand-sewing needle Thread to match binding Marking tools (optional)
Learn how to:What You'll Get:
Here’s what you’ll need:
Paper-Pieced Quilts: Sewing Blocks and Assembling a Quilt Top
Block A = 6” square (make 5 blocks total)
Block B = 4” x 6” (make 4 blocks total)
Block C = 2” x 7 1/2” (make 6 blocks total)
Paper-Pieced Quilts: A Modern Approach to Quilting
Downloads:
- A 2-Part course where you will learn how to design a paper-pieced quilt and incorporate free-motion and straight-stitching techniques
- 7 HD video lessons you can access online anytime, anywhere
- Detailed supplies list
- Step-by-Step expert instruction from Carolyn Friedlander
- The ability to leave comments, ask questions, and interact with other students

Member Gallery
Browse members' projects from this class and share your own work! Learn how to take great photos here.
Load More
Class PDF
Transcript
Notes
Your timecode tags and notes for this section
Paper-Pieced Quilts: A 2-Part Series Reviews
625 users recommended this class to a friend

Deseria Ramos
Great lesson. Looking forward to trying it.
March 14, 2024

Maria Conti
I want to try this, so bad! The instructions are excellent! So much detail given for a no fail beautiful quilt top! Thank you
More than 3 months ago
Nicole Sheppy
Demystifies FPP in a way that makes it approachable. The emphasis on triangles (not hst/qst) is fun and refreshing. There's not much mention of seam pressing / nesting. As a beginner quilter, I find I end up in trouble / with bulky seams if I don't think about this ahead of time.
More than 3 months ago
Related Classes